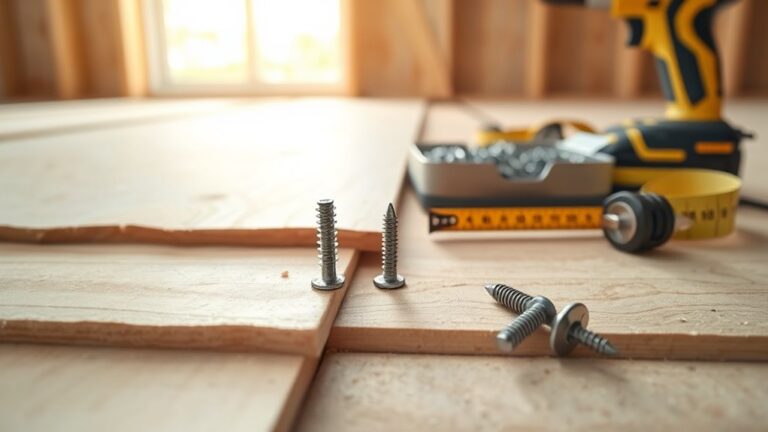
Can You Hammer a Screw – When It Works and When It Ruins the Fastener
You can sometimes hammer a screw to seat it quickly in soft wood, thin sheet metal, or to nudge a stuck fastener, but you’ll risk stripping heads, bending shafts, cracking brittle materials, or crushing anchors if you use heavy blows or the wrong screw. Use light taps, pilot holes, or an impact driver and protect the head with a washer; avoid hard woods, plastics, and structural or automotive joints. Keep going to learn when to stop and safer alternatives.
Quick Answer: Can You Hammer a Screw?
Wondering if you can hammer a screw? You can in rare cases—soft metal, temporary hold, or creative use with decorative finishes—but it often damages threads, splits wood, and ruins fit.
Historical techniques sometimes used pounding for rivet-like joins, yet modern screws were designed to be driven. You should usually use a driver; hammering is an exception, not a recommended method.
When Hammering Is a Useful Shortcut
When might you reach for a hammer instead of a driver? You might tap a screw flush when material prevents twisting, or seat a short, soft screw into thin stock quickly.
Consider fastener coatings—brittle plating can chip—and environmental factors like cold that harden wood. Use light, controlled blows and a pilot hole; this shortcut works for temporary holds, not for load-bearing or finished work.
When You Should Never Hammer a Screw
Don’t try hammering a screw if its threads are already stripped or damaged, because you’ll only make the fastener useless.
You also shouldn’t use a hammer on fragile or thin materials that will crack or bend under blunt force.
And if the job needs precision or exact alignment, taping or pounding a screw will ruin the fit and cost you time fixing it.
Stripped Or Damaged Threads
If the screw’s threads are stripped or the mating threads in the material are damaged, don’t try to force it with a hammer—you’ll only make extraction harder and risk wrecking the part. You should inspect for thread corrosion and check fastener compatibility. Use extractors, heat, or replace the damaged insert instead of hammering.
| Issue | Risk | Fix |
|---|---|---|
| Stripped threads | Worse damage | Extractor |
| Corrosion | Seized fastener | Clean/replace |
| Mismatch | Failure | Match size |
Fragile Or Thin Materials
Stripped or corroded threads call for extractors and repair, but thin or fragile materials present a different danger: hammering a screw can crush, split, or deform the substrate before the fastener ever bites.
You should assess material compatibility and avoid impact if fiberboard, thin metal, or brittle plastics are involved.
Prioritize impact safety—use anchors, adhesive, or low‑force fasteners instead.
Precision Or Alignment Needed
Need perfect alignment? If your project demands exact positioning, don’t hammer a screw. You’ll cause alignment issues, bend threads, or shift the part, creating precision concerns that ruin fit and function.
Use a driver, pilot hole, clamps, or guide instead. Those methods preserve geometry and let you control torque and depth without risking misalignment or damaged fasteners.
How to Decide in 30 Seconds Whether to Hammer
Wondering whether you can safely hammer a screw? Check material, head condition, and purpose: hardwood or damaged head? If alignment and precision matter, don’t.
Consider historical context and cultural significance only as background—focus on function. Tap gently first; if it bites, continue carefully.
Stop if the screw or substrate cracks, strips, or bends. When in doubt, use the right fastener.
Screws That Tolerate Impact
One type of screw that handles impact well is the hardened lag screw. You can tap these into timber or masonry with care; they resist shear and flex better than softer fasteners.
Choose options with impact resistant coatings to reduce screw corrosion and extend life.
- Hardened lag for structural pulls
- Heat-treated wood screws for rough work
- Coated masonry screws for damp sites
Screw Types to Never Hit With a Hammer
Although some screws stand up to tapping, you should never hit brittle or precision fasteners with a hammer. You’ll crack hardened steel, snap thin-sheet self-tappers, and ruin threads on finely threaded machine screws.
Impact accelerates screw corrosion by breaking coatings and distorting fastener design, inviting rust and seizing. Don’t strike plated, stainless, or micrometer-grade screws — use proper tools instead.
Materials That Accept a Hammered Screw
If you need to drive a screw without a driver, you can get away with hammering into soft woods like pine or cedar because they compress rather than split.
Thin sheet metal can also accept a hammered screw if you use a self-tapping or pointed fastener and control the blows.
Be careful though—both materials can deform or tear if you hit too hard or use the wrong screw type.
Soft Woods
Because softwoods compress and split less when struck, you can often drive screws with a hammer into pine, cedar, fir, and similar species without predrilling — but you should still choose the right screw type and strike technique to avoid stripping or breakage.
You’ll watch wood grain direction and knot tension, use coarse threads, and tap gently to seat the screw.
- Choose coarse-thread screws
- Tap along grain
- Avoid knots
Thin Sheet Metal
Want to drive a screw into thin sheet metal with a hammer? You can, cautiously: thin metal bends and the hammer’s impact helps start penetration if you pick the right screw.
Prioritize thread compatibility to avoid stripping and choose corrosion resistance coatings for longevity.
Tap lightly, check alignment, and back off if metal deforms—otherwise you’ll ruin the fastener or the panel.
Materials That Split or Crack From Impact
Curious whether a quick tap will ruin a piece of wood or plastic? You risk material cracking and long-term impact fatigue in brittle woods, thin plastics, and aged composites.
If you force a screw without proper prep, the force can split fibers or create microfractures that grow.
- Brittle hardwoods
- Thin acrylics and PVC
- Weathered composite panels
How Pilot Holes Change the Outcome
If you drill a proper pilot hole first, the screw drives in smoothly and the wood or plastic is far less likely to split.
Drill a proper pilot hole first — screws drive smoothly and wood or plastic is far less likely to split.
You’ll control alignment, reduce driving torque, and limit shock from a hammer.
Pilot holes improve thread compatibility and let you add screw lubrication when needed.
That prevents binding, preserves fastener strength, and keeps fragile materials intact.
Drive vs. Impact: Hammer Blows vs. Impact Drivers
You can’t treat hammer blows and impact drivers the same when it comes to threads, because blunt force can crush or strip them.
Impact drivers deliver quick, rotational bursts that drive the screw. Consider how each tool’s energy is transferred: a hammer delivers linear shock, an impact driver converts force into controlled torque pulses.
Also think about the fastener material limits—soft metals and brittle screws won’t take repeated shock or high torque without failing.
Hammering vs. Impacting Threads
When you compare hammer blows to an impact driver’s rapid concussive turns, the difference in how a screw’s threads react is dramatic. You’ll see deformation, galling, or preserved integrity depending on technique, screw lubrication, and impact resistance.
Know when to avoid blunt force and when to use a proper impact driver to protect threads.
- Compression and thread flattening
- Friction, heat, and galling
- Preserved engagement with impacts
Tool Energy Delivery
How does the energy you apply change the way threads take a fastener? You’ll feel steady rotational drive seat threads cleanly, reducing galling and screw corrosion risk.
Repeated hammer blows deliver shock that can deform threads, crack plating, or create magnetic attraction by embedding ferrous debris.
Use impact drivers for controlled impulses; avoid direct hammering unless aligning noncritical parts or using sacrificial fasteners.
Fastener Material Limits
Why does the way you deliver force matter to a screw’s metal? You risk deforming threads, cracking plating, or inducing microfractures that worsen fastener corrosion. Choose tools by material and impact resistance.
- Soft metals: avoid hammer blows; use controlled torque
- Hardened screws: prefer impact drivers for short, sharp energy
- Coated fasteners: hammering can break protective layers
When a Punch Is Better Than a Hammer
Ever wondered whether a punch might be the smarter choice over a hammer? You use a punch when precision matters, avoiding screw corrosion from damaged coatings and preserving fastener aesthetics. It centers blows, prevents slipping, and limits deformation.
| Benefit | When to use |
|---|---|
| Precision | Small heads |
| Protection | Corrosion risk |
| Control | Tight spaces |
| Finish | Visible hardware |
Drive a Screw With a Hammer : Step‑by‑Step
Want to drive a screw with a hammer? You’ll tap gently to seat the head, avoid stripping, and check fastener branding to match strength.
Protect finishes if screw painting is planned. Follow these concise steps:
- Light taps to start, align driver slot with head.
- Increase force gradually, stop if head deforms.
- Inspect fastener branding and thread engagement before finishing.
Seat a Screw With a Punch or Drift
When you need to seat a screw flush or pull a stubborn head below the surface, use a center punch or drift to transfer controlled blows without damaging the surrounding material. Aim carefully, protect the finish, and tap progressively to avoid stripping.
You can combine light screw lubrication beforehand to reduce torque and plan thread repair if distortion occurs, but don’t force damaged fasteners.
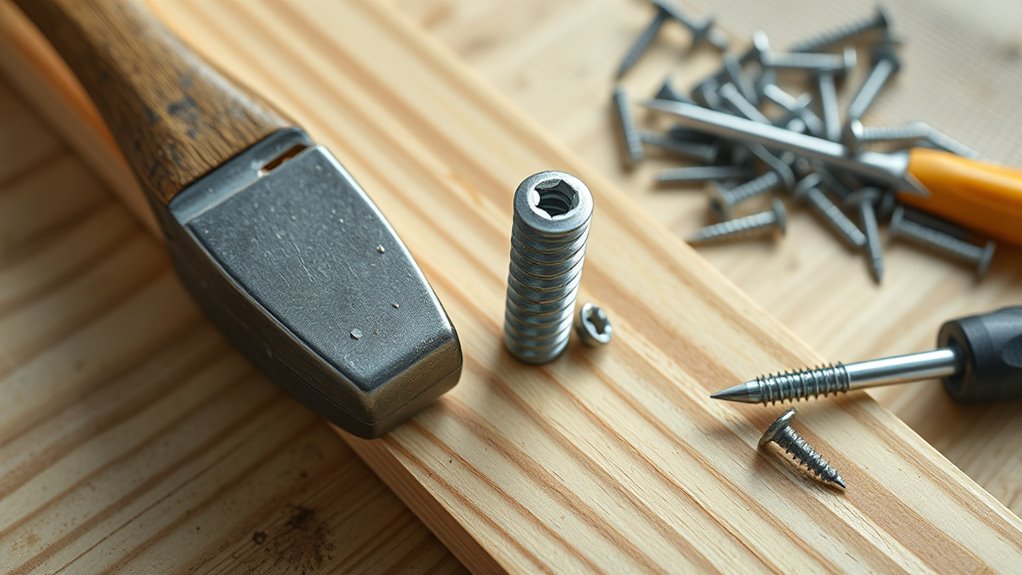
Using Washers or Shims Before Hammering
Before you hammer a screw, use a washer or thin metal shim to spread the force and prevent head damage.
Pick a washer that matches the screw diameter and material so it won’t deform or corrode under impact.
For tight gaps, a thin metal shim gives you control without adding bulk, letting you seat the screw cleanly.
Preventing Head Damage
Curious how to keep a screw head from mushrooming when you hammer it? Use a thin washer or shim to spread impact, apply screw lubrication to reduce friction, and wipe surfaces for rust prevention before striking. These steps cut deformation and corrosion risk.
- Cushion impact with a washer
- Lubricate threads and head
- Clean for rust prevention
Choosing Proper Washer
Which washer should you pick to protect a screw head when you hammer it? Choose a hardened steel or thick nylon washer that matches screw diameter and head shape.
You’ll fit it snugly during washer installation, ensuring even force distribution.
Apply minimal screw lubrication to threads only, avoiding the head, so the washer stays secure and prevents crushing or deformation when you tap the screw.
Using Thin Metal Shims
If you want extra protection beyond a washer, thin metal shims give you a low-profile barrier that spreads hammer blows and prevents the screw head from deforming.
You can place metal shims to boost impact resistance, align the load, and avoid crushing.
Use shims sized to the screw head and material hardness to match the task for predictable results.
- Spread force evenly
- Improve impact resistance
- Prevent head deformation
Preparing Soft Materials for Tapped Screws
When you’re working with soft materials like pine, MDF, or plastic, preparing the hole before tapping is crucial to prevent peeling, cracking, or stripped threads. You should choose proper drilling size, deburr edges, and use pilot holes.
Threading techniques matter: cut threads slowly and back out often.
Material conditioning—like light sanding or sealing—reduces tear-out and increases holding strength.
How to Avoid Stripping a Screw Head With Impact
Preparing holes and threads in soft materials sets you up for secure fastenings, but driving screws with impact tools introduces a new risk: shearing or camming out the head.
You can avoid stripping by selecting proper bits, using Screw lubrication sparingly, and choosing Impact resistant coatings when appropriate.
- match bit to screw
- use controlled torque
- prep pilot holes
Signs a Hammered Screw Is Damaged
Though a quick tap might seem harmless, hammering a screw often leaves telltale damage you can spot at a glance. You’ll notice mushroomed heads, split slots, and rounded driver recesses. Damaged fastener coatings flake or burn. Rust can form where plating cracks.
If a magnetic tips driver won’t seat cleanly or slips, the head’s geometry is compromised and the screw’s reliability is reduced.
Remove a Stripped or Damaged Screw After Hammering
First, check how badly the head and threads are damaged so you can pick the right removal method.
You’ll decide between using a screw extractor, pliers, or drilling based on that assessment.
After you’ve removed it, take steps like using the correct tip, pilot holes, and controlled force to avoid stripping screws in the future.
Assess Damage Extent
How badly did the hammering affect the screw and surrounding material? You inspect head deformation, thread damage, and substrate harm; consider tool ergonomics and material flexibility when judging repairability.
- Head rounded, grip compromised
- Threads flattened, extraction risk
- Surrounding material cracked or compressed
You document damage, decide if extraction is feasible, and plan next steps without worsening the site.
Choose Extraction Method
When deciding how to extract a screw you’ve hammered and stripped, match the method to the damage, material, and tools you have on hand; doing so saves time and prevents further harm. You’ll weigh drill-out, extractor, left-hand bit, or pliers against Fastener corrosion and Impact safety concerns.
| Damage | Tool | Result |
|---|---|---|
| Minor | Pliers | Grip restored |
| Moderate | Extractor | Controlled removal |
| Severe | Drill | Material loss |
Prevent Future Stripping
Want to avoid ruining the next screw? After removing a damaged fastener, clean the hole, treat fastener corrosion, and apply proper screw lubrication before reinstalling. That prevents seizing and stripping.
- Clean threads and hole debris
- Use anti-seize or light oil for screw lubrication
- Replace corroded screws with coated or stainless fasteners to resist fastener corrosion
Temporary vs. Permanent Fixes After Tapping a Screw
If you tap a screw and discover the fit’s not right, you’ll need to decide whether to use a temporary fix—like a threadlocker, washer, or oversize nut—or make a permanent repair such as re-tapping to a larger size or installing a helicoil.
Choose based on load, access, and how long you expect the joint to last.
Consider screw corrosion from environment and Fastener manufacturing quality when choosing.
Nail vs. Screw: When a Nail Is Better
Sometimes a nail is the smarter choice over a screw, especially where shear strength, speed, and minimal splitting matter. You’ll pick nails when screw compatibility is limited or when Hammer alternatives aren’t practical.
Nails flex under lateral load and install fast, making them ideal for temporary bracing or framing where movement occurs.
- Faster installation
- Better shear performance
- Less wood splitting
Concrete Screws and the Need for a Hammer Drill
Because concrete’s dense, brittle nature resists ordinary drilling, you’ll usually need a hammer drill to install concrete screws properly.
You’ll drill a correct-size hole, clear dust, then drive the screw; hammering the screw itself can crack the substrate.
Use coatings to prevent screw corrosion and apply thread lubrication sparingly for easier drive and proper seating without compromising grip or concrete integrity.
Drywall Anchors: When Hammering Ruins Them
When you hammer a drywall anchor, you can crush its thin plastic or gypsum body.
This causes anchors that crumble instead of gripping.
Once the anchor’s integrity is compromised, its holding strength drops and screws can pull out under load.
That damage can also tear the surrounding wall, leaving bigger repairs than the original job.
Anchors That Crumble
Ever tried hammering a plastic drywall anchor and watched it shred instead of seat? You’ll see anchor deterioration when brittle materials meet heavy impact.
Check material compatibility before striking; some anchors crush, not compress.
- Use anchors rated for impact
- Avoid thin plastic in older walls
- Test on scrap or use pilot holes
Hammering can ruin anchors; choose appropriate types.
Compromised Holding Strength
Shoving a hammer into a brittle anchor doesn’t just shred plastic—it weakens how much load the anchor can hold. You’ll notice threads strip and the anchor’s grip loosens, reducing pullout resistance.
Hammer impacts cause microfractures, encourage material expansion under stress, and expose surfaces to fastener corrosion.
Don’t assume a hammered anchor will carry rated loads; its holding strength is compromised and unpredictable.
Wall Damage Risks
If you hammer a drywall anchor, you can tear the paper face and crush the gypsum beneath it, leaving a ragged hole that won’t hold a screw properly.
You’ll need wall reinforcement or larger anchors, and you’ll check paint compatibility if repairs are visible.
Don’t assume cosmetic fixes equal structural repair.
- Replace with proper anchor
- Use backing or stud
- Patch and match paint
Automotive Fasteners: Why Hammering Can Be Dangerous
Though it might seem quicker in a tight spot, hammering a screw on a car can cause more harm than help. You risk stripping threads, misaligning parts, and accelerating fastener corrosion while compromising impact safety. Don’t improvise — use proper tools.
| Risk | Effect | Remedy |
|---|---|---|
| Stripped threads | Loose joints | Use driver |
| Misalignment | Leaks/vibration | Align first |
| Corrosion | Seizure | Clean/protect |
| Safety | Fracture | Torque spec |
How Screw Material Affects Impact Tolerance
When you hammer a screw, the material makes a big difference: steel holds up better under impact than soft metals like brass or aluminum.
Heat-treated steel can absorb shocks and resist cracking far more effectively than untreated or softer alloys.
Knowing the screw’s composition and treatment helps you predict whether it’ll bend, shear, or shatter under a blow.
Steel Vs. Soft Metals
Because material changes how a screw absorbs and redirects force, you’ll notice very different results hammering a hardened steel screw versus a soft-metal one.
You’ll risk deformation or breakage in soft alloys; steel tolerates impact but can suffer metal fatigue over time.
Consider corrosion resistance too when choosing materials.
- Hardened steel: higher impact tolerance
- Brass/aluminum: dent, bend easily
- Coatings improve longevity
Heat Treatment Effects
Material and surface finish set the stage, but how a screw was heat-treated largely determines how it handles sudden blows. You’ll find quenching, tempering, and annealing change hardness and toughness.
Heat effects can embrittle or toughen metal. Consider grain structure and residual stresses: they alter impact tolerance and interact with thermal expansion during rapid temperature shifts.
Choose treatment to match expected hammering.
How Screw Size and Thread Affect Hammering Success
Although you can sometimes force a screw into wood with a hammer, its size and thread profile largely determine whether that will work or just ruin the fastener. You should consider shaft diameter, thread depth, and pitch; mismatches cause splitting, stripping, or fastener corrosion and harm material compatibility.
- Thin shanks bite less, strip easier
- Coarse threads displace grain differently
- Fine threads hold better in dense wood
Head Styles and How They Handle Blows
How does a screw head stand up to being struck? You’ll judge by head style, fastener chemistry, and screw ergonomics: countersunk, pan, and hex react differently to blows. Use the table to compare.
| Head Type | Impact Behavior | Best Use |
|---|---|---|
| Countersunk | Deforms under sharp blows | Flush joints |
| Hex | Transmits force well | Heavy duty applications |
Wood Screws vs. Sheet‑Metal Screws Under Impact
When you smack a wood screw you’ll often crush or mushroom the head before the shank fails, which ruins the bit engagement.
With sheet‑metal screws you’re more likely to shear the threads or break the shank clean off under impact.
Knowing which failure mode to expect helps you pick the right fastener or tool if you’re planning to apply hammer blows.
Wood Screw Head Damage
Curious whether a quick tap with a hammer will ruin a screw head? You can damage a wood screw head by deforming the drive, especially if corrosion has weakened the metal or fastener lubrication masked proper bite. Tap gently only to seat; avoid repeated blows.
- Inspect head for rust or stripping
- Use lubrication sparingly and correctly
- Replace damaged, corroded screws promptly
Sheet‑Metal Screw Shearing
Why would a quick bang affect a sheet‑metal screw differently than a wood screw? You risk shearing the brittle shank or threads in thin metal where impact concentrates stress.
Wood screws flex into fibers. Surface finishing and corrosion resistance coatings can mask microcracks but won’t prevent abrupt shear.
Don’t hammer sheet‑metal screws—use proper fasteners or rivets to avoid sudden failure and compromised joint integrity.
Torque, Shear, and Mechanical Limits Under Impact
Although a single sharp blow can seem to turn a screw, impact loading changes how torque and shear interact and can push fasteners past their mechanical limits.
You risk overstressing threads, fracturing heads, or causing sudden shear failures; fastener chemistry and corrosion resistance affect tolerance to such shocks.
- Instantaneous torque spikes
- Shear plane fatigue
- Material brittleness and surface degradation
Using Heat or Lubrication to Reduce Damage Risk
If you apply heat or the right lubricant before attempting to drive or remove a screw, you’ll reduce the force and impact needed and lower the risk of stripping, cracking, or sudden shear.
You should warm seized threads carefully, apply appropriate heat lubrication like penetrating oil, let it soak, then work the screw gently.
That preserves fastener durability and reduces sudden failure.
Tools and Improvised Protectors for the Screw Head
When you need to hammer near a screw head, use a washer under the screwdriver or bit to spread impact and protect the slot.
You can also clamp the screw with soft-jaw pliers to hold it steady and prevent marring.
These simple tools cut damage risk and make any tapping or persuasion more controlled.
Protecting With Washers
Want to keep a screw head intact while you hammer or drive it? Use washers as simple protectors: they spread impact, prevent marring, and aid rust prevention when you pick the right material.
Focus on washer selection for fit and finish to avoid wobble or crushing.
- Thin metal washer for impact distribution
- Nylon washer for cushioning and corrosion barrier
- Copper washer for soft contact and conductivity
Using Soft-Jaw Pliers
You can also protect a screw head by gripping it with soft-jaw pliers instead of hammering directly. After using a washer to spread impact, soft jaws give a controlled grip that prevents marring, slipping, or rounding the corners.
Use a soft jaw insert or tape to cushion the metal, position a firm pliers grip, and tap gently—this preserves threads and head geometry without deforming the fastener.
Common Mistakes That Ruin Screws
Although it may seem simple, a few common mistakes will strip a screw of its strength or make it impossible to remove later. You’ll damage fastener coatings, reduce corrosion resistance, or deform heads by improper tools or hammering.
Avoid overdriving, using wrong drivers, and striking near hardened threads.
- Overdriving into soft material
- Wrong driver/size mismatch
- Hammering near threads
Real Repairs Where Hammering Worked
Mistakes like overdriving or striking near threads can make hammering look reckless, but there are plenty of repairs where a well-placed tap saved the day.
You’ve rescued seized screws by freeing slight screw corrosion with gentle taps, nudged flush fasteners without stripping heads, and restored fastener aesthetics after minor deformations.
You’re careful, use light force, and know when tapping’s appropriate.
Real Failures: Lessons From Ruined Fasteners
You’ve probably seen cases where hammering left stripped screw heads that no driver can bite into.
Other times the shaft’s bent or snapped, or the threads shear off and the fastener won’t hold.
These failures show what can go wrong and what to avoid next time.
Stripped Screw Heads
When a screwdriver slips and chews the recess of a fastener, you’re left with a stripped screw head that can turn a simple repair into a stubborn problem. Recognizing how and why heads strip helps you avoid the pain of extraction and replacement.
You can prevent stripping by using proper driver fit, screw lubrication, and tools with good impact resistance.
- Match driver size
- Controlled torque
- Clean contact surfaces
Bent Or Broken Shafts
If a fastener’s shaft is bent or breaks, the whole assembly can fail suddenly and dangerously. So you need to know what causes those fractures and how to spot early warning signs.
You’ll spot bends from misaligned loads, impact damage, corrosion pits, or material deformation from over-torquing.
Replace compromised parts immediately to preserve fastener longevity and prevent sudden catastrophic failure.
Sheared Threads
Though it can start as a small nick or overload, sheared threads strip under load and turn a once-secure fastener into a useless, often dangerous part. You’ll notice loss of clamping, seizure from thread corrosion, and ruined fastener aesthetics.
Replace rather than repair in most cases to avoid failure.
- Inspect engagement depth
- Check for corrosion pitting
- Prioritize replacement over cosmetic fixes
Safety Precautions When Hammering Screws
Because pounding a screw can send it slipping or shattering, you should take clear safety steps before you start.
Wear safety gear—goggles, gloves, ear protection—and clamp the workpiece securely.
Check your workshop setup for stable surfaces and good lighting.
Use the correct hammer size and a center punch to guide impact.
Stop if the screw deforms or the material cracks; reassess before continuing.
Alternatives When You Lack a Screwdriver or Drill
If you don’t have a screwdriver or drill, you can still turn a screw with improvised manual drivers like a coin, butter knife, or the tip of a flathead chisel.
You can also leverage household tools—pliers for gripping and turning, a wrench on hex-head screws, or a sturdy nail set as a makeshift driver.
Use steady pressure and match the tool to the screw head to avoid stripping or slipping.
Improvised Manual Drivers
Need a screwdriver right now? You can fashion improvised manual drivers carefully; prioritize power tool safety and consider alternative fasteners if stripping seems likely.
Use sturdy makeshift tips to turn screws without drills.
- Use a coin edge for flat heads
- Wedge a knife blade cautiously
- Tap a hex bit into a nut for grip
Leveraging Household Tools
You can often make do with common household items when you don’t have a screwdriver or drill: a butter knife, adjustable wrench, pliers, or even a sturdy coin can serve as substitutes depending on the screw head and torque required.
Clamp carefully, apply screw lubrication for stuck fasteners, and work slowly to avoid stripping.
Watch for fastener corrosion; replace damaged screws rather than forcing them.
Quick Emergency Tools to Carry for Fixes
When something breaks unexpectedly, having a small kit of versatile tools can let you fix most problems on the spot. You’ll want items that address screw corrosion and fastener corrosion, stripped heads, and quick clamps so you don’t make things worse.
- Compact multi-bit driver set
- Penetrating oil + wire brush
- Mini vise/grip clamp
Cost vs. Time: Fix Now or Buy the Right Tool?
Although a quick fix can save time now, weigh the immediate cost against the chance you’ll need to redo the job later or cause more damage.
You’ll consider tool ergonomics, durability, and how improper hammering accelerates fastener corrosion.
Buying the right driver or extractor often prevents repeats, saves labor, and protects materials.
Choose investment when frequency, safety, or finish quality matters.
Preventive Habits to Avoid Hammering Screws
If you’d rather buy the right driver than keep fixing mistakes, build habits that prevent ever needing a hammer on a screw. Check screw type and driver before starting, protect nearby electrical wiring, and clean surfaces for smooth seating during paint preparation.
Train yourself to pause and reassess tight fits instead of forcing.
- Verify driver fit
- Shield wiring and circuits
- Prep and clean surfaces
How to Prepare a Pilot Hole Quickly
Because a clean pilot hole guides the screw and prevents splitting, start by matching the drill bit to the screw’s core diameter and marking your spot with a punch or awl.
Then clamp the work, set the drill to a low speed, and drill straight to the depth of the screw (use tape on the bit as a depth stop) so the fastener threads bite cleanly without wandering.
Maintain drill control, consider tool ergonomics, and deburr the hole for consistent screw aesthetics.
When to Call a Pro Instead of Improvising
When a job risks your safety, the structure, or expensive systems, call a pro rather than improvising. You shouldn’t gamble with load-bearing connections, hidden wiring, or precision finishes.
If a task threatens safety, structure, or costly systems, call a pro—don’t improvise.
A pro prevents worsened damage, preserves screw aesthetics, and stops fastener corrosion from improper fixes.
- Load-bearing or structural repairs
- Electrical, plumbing, or HVAC work
- Visible finish or warranty‑covered surfaces
Pre‑Tap Checklist: Do This Before You Tap a Screw
Before you start hammering, run through a quick checklist so you don’t make things worse. Inspect screw corrosion, choose correct pilot size, confirm material thickness, and pick proper tool. Clean and lubricate threads to aid fastener longevity. If doubtful, stop.
| Item | Action | Why |
|---|---|---|
| Inspect | Look for rust | Prevent failure |
| Pilot | Drill correct size | Avoid splitting |
| Tool | Select punch/bit | Control impact |
| Clean | Remove debris | Improve fit |
| Lubricate | Apply oil | Extend life |
Further Reading and Trusted Resources
Want reliable places to learn more? You’ll find practical guides, safety data, and tool tips that cover when to use screw lubricant or a magnetic screw driver, plus tap techniques and material compatibility.
Want reliable resources? Find practical guides, safety data, and tool tips—from lubricants and magnetic drivers to tap techniques.
- Manufacturer manuals and safety datasheets
- Trade forums and how‑to video channels
- Engineering handbooks and standards bodies (fastener specs, torque charts)
Frequently Asked Questions
Can Hammering a Screw Affect Corrosion Resistance or Coating Integrity?
Yes — hammering can damage coating integrity and undermine corrosion prevention; you’ll crack or strip platings, remove protective layers, and create stress points that accelerate rust, so avoid impacts on coated or treated screws whenever possible.
Can Hammering Alter Thread Pitch Enough to Prevent Future Removal?
Yes — if you hammer a screw hard enough, you’ll cause thread deformation that changes pitch and geometry, compromising fastener integrity and potentially locking the screw in place so you can’t remove it later without damage.
Does Hammering a Screw Change Electrical Conductivity in Grounding Applications?
Yes — hammering can cause electrical conductivity alteration by deforming threads and coatings, so you’ll risk reducing grounding reliability; bent or crushed contact surfaces and damaged plating can increase resistance and compromise the ground.
Will Hammered Screws Loosen Over Time Due to Vibration?
Yes — hammered screws can loosen over time from vibration. You’ll get screw deformation that reduces engagement and fastener stability, so components shift, threads strip, and the connection works loose unless you repair or replace with proper fastening methods.
Can Hammering Transmit Damaging Shock to Nearby Electronics or Sensors?
Yes — you can transmit damaging shock to nearby electronics and sensors when hammering; you’ll cause vibration damage and shock transmission through structures, so you should avoid direct blows near sensitive equipment or use isolation and damping measures.
Conclusion
So, yes — you can sometimes hammer a screw, but don’t go swinging like a pirate at a treasure chest unless you want a splintered disaster. Use impact for stubborn sheet‑metal or hardened drywall screws, not brittle wood screws or machine threads. When in doubt, drill a pilot, tap, or call a pro. A single misguided whack can turn a useful fastener into useless junk — and your repair into a dramatic, slow‑motion collapse.