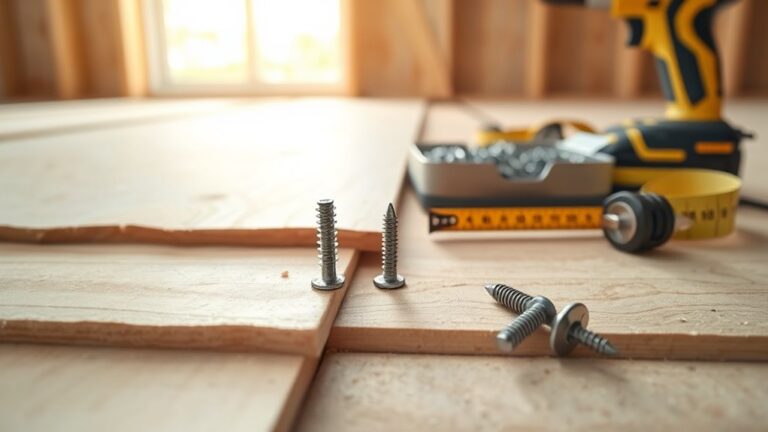
Can You Cut Screws Shorter? Step-by-Step DIY Guide
Yes — you can cut many screws shorter at home if you use the right tools and protect the threads. Secure the screw in a vise or locking pliers, mark the cut, cover nearby threads with a nut or tape, and cut with a hacksaw, rotary cutter, or bolt cutters depending on material. File and deburr the end, then reform threads with a die if needed. Follow safety steps and you’ll find step-by-step techniques and tool tips ahead.
Quick Answer: Can You Shorten a Screw?
Want a short answer? Yes—you can shorten many screws, but it depends on screw types and material.
Want a short answer? Yes—you can shorten many screws, depending on screw type and material.
You’ll preserve threads, drive integrity, and holding strength if you pick the right method.
Consider cutting safety: wear eye protection, secure the screw, and use proper tools to avoid slips or heat damage.
Some specialty screws shouldn’t be altered.
Quick Step-by-Step: Shorten a Screw Safely
You can move from the quick yes/no into action by following a safe, straightforward sequence that protects the screw and you.
Clamp the screw, mark the cut, and wear eye protection.
Cut with a suitable blade, deburr the end, and file threads carefully to avoid nicking them.
Inspect for screw corrosion and perform any necessary thread repair before reinstalling.
Tools for Cutting Screws : Overview
Before you start, gather a few purpose-made tools so the cut is clean, safe, and quick: a hacksaw or rotary tool with a cutting wheel handles most metals.
A bolt cutter or wire cutters work for softer screws.
A good vise or clamp plus cutting oil, safety glasses, and a file or thread chaser finish the job.
Check screw head type and thread pitch; match tool to material.
Best Budget Tools for Occasional Cutting
When you only need to trim screws now and then, inexpensive tools can do the job cleanly without breaking the bank. Use a rotary tool with cutoff wheel for quick cuts.
When you only need to trim a screw occasionally, a rotary tool with a cutoff wheel does the job cleanly.
A bolt cutter is suitable for thicker fasteners.
Quality wire cutters are ideal for small screws.
File sharp edges to preserve screw aesthetics and add a light coating to prevent screw corrosion after cutting.
Best Pro Tools for Frequent Cutting
If you’re cutting screws often, you’ll want pro-grade tools like a cutoff wheel on a die grinder or a compact abrasive saw to speed the job and keep cuts clean.
Check durability factors—motor power, bearing quality, and cooling—to make sure the tool holds up under heavy use.
Also pick safe accessories like clamp-on guards, splash shields, and proper cutting wheels to protect you and the workpiece.
Best Cutting Tools
Because you’ll be cutting screws often, invest in pro-grade tools that save time and give consistent results. Use a rotary tool with cutting wheels for quick, clean cuts and a bench vise to steady screws for thread preservation.
For precision and screw aesthetics, keep a fine file or deburring wheel handy to smooth edges. A hacksaw suits thicker fasteners.
Tool Durability Factors
Although you’ll rely on cutting tools every day, you need gear that can take constant use without degrading — look for hardened steel or carbide cutting edges, robust housings with sealed bearings, and replaceable wear parts so you won’t be forced into full-unit replacements.
Prioritize tool ergonomics for comfort during repetitive cuts and confirm material compatibility so blades stay sharp and safe across metals and coatings.
Safe Cutting Accessories
Now that you’ve picked durable cutting tools, outfit yourself with accessories that keep each cut controlled and safe. Use clamps, vises, and guides to steady screws and avoid screw graffiti when finishing decorative fasteners.
Essentials:
- Locking bench vise for firm hold.
- Quick-release clamp for one-handed work.
- Cutting wheel guard and guide.
- Magnetic parts tray to catch shavings.
Pick a Cutting Method by Screw Size & Material
When choosing how to shorten a screw, match the cutting method to the screw’s diameter and material so you get a clean cut without damaging threads.
For thin or soft screws, use bolt cutters or a rotary tool.
For thicker, harder metals, use a hacksaw or cutoff wheel.
Consider screw length and material compatibility to pick a method that preserves threads and avoids warping.
Safe Screw Types to Shorten
If you’re shortening screws, pick ones made from malleable or common steels and softer alloys—like mild steel, brass, or stainless grades labeled 18-8—because they cut cleanly and hold threads well.
Consider Material compatibility and Thread repair needs when choosing screws.
- Mild steel
- Brass
- 18-8 stainless
- Zinc-plated common steel
Screw Materials That Are Hardest to Cut
When you try shortening screws, hardened steel screws are the toughest because their heat-treated cores resist cutting and wear down tools fast.
Stainless steel alloys also give you trouble—especially high-strength grades that work-harden as you cut, clogging blades and grinding wheels.
Plan for proper tools and slower cutting speeds when you encounter these materials.
Hardened Steel Screws
Although they’re among the toughest fasteners you’ll encounter, hardened steel screws are intentionally made that way to resist shear and wear, so cutting them takes more planning and the right tools.
You’ll need to take into account hardened steel and screw durability. Use:
- Cut-off wheel
- High-speed grinder
- Cutting oil
- Eye and hand protection
Work slowly, clamp securely, cool frequently.
Stainless Steel Alloys
Hardened steel gave you a taste of tough-to-cut fasteners; stainless steel alloys raise the difficulty with different challenges. You’ll find varied alloy composition affects hardness and chip behavior.
High corrosion resistance grades like 300 and 400 series work-harden rapidly under heat. Use sharp tools, cut slowly with coolant, and support the screw to avoid galling or tearing when shortening these stubborn stainless fasteners.
When You Should Not Shorten a Screw
If the screw’s strength, length, or head type is critical to the joint’s integrity, don’t shorten it—cutting can weaken the shank, ruin threads, or prevent proper seating of the head.
Consider avoiding cuts in these cases:
- Load-bearing fasteners
- Fine-thread or tapered screws
- Sealed or coated hardware
- Specialized screws (medical, dental hygiene tools, precision gardening tips)
How to Measure and Mark a Screw Accurately
Before you cut, measure and mark precisely so the screw fits and the head seats properly — grab calipers or a combination square and measure from the screw’s tip to the point where it needs to end, accounting for material thickness and any countersink depth. Mark with a fine-tip marker or scribe, note thread repair needs and plan for coating preservation.
| Tool | Purpose |
|---|---|
| Calipers | Accurate length |
| Square | Angle/check |
| Scribe | Fine mark |
| Marker | Visible mark |
| Gauge | Thread check |
How to Clamp a Screw So It Won’t Spin or Crush
Before cutting, you’ll want to clamp the screw securely so it won’t spin under the cutter.
Use a proper tool—like locking pliers with protective pads or a small vise—to grip the screw without crushing the shaft or damaging surrounding material.
Position the clamp close to your cut mark and test by turning the screw gently to confirm it’s held firmly.
Prevent Screw Spinning
When you shorten a screw, you’ll often face spinning or spinning that strips the head; prevent it by clamping and preparing the screw.
Use a vise or locking pliers, add backing material, and protect threads from screw corrosion while planning thread repair if needed.
- Vise grips
- Soft-jaw pads
- Backing block
- Thread lubricant
Avoid Crushing Material
If you clamp a screw too hard to stop it spinning, you can crush the workpiece or deform the screw—so balance is key.
Support the material beneath the head, apply steady moderate pressure, and check alignment frequently.
Avoid excessive force that causes material expansion or burrs.
After cutting, remove debris and inspect for surface corrosion; slight squeeze marks are acceptable, but distortion isn’t.
Use Proper Clamping Tools
Although a steady grip matters, choosing the right clamping tool is what actually prevents a screw from spinning or crushing the workpiece. You’ll protect the screw head and respect thread pitch by using the correct method:
- Vise with soft jaws for metal screws.
- Bench clamp with padding for wood.
- Locking pliers for small fasteners.
- Rubber jaw clamp to avoid crushing.
How to Protect Threads Before Cutting
Want the cut to clean up and still thread smoothly? Protect threads with tape or a nut, apply thread lubrication, and support the screw for neat cutting; store trimmed screws properly in labeled screw storage.
| Step | Protect | Why |
|---|---|---|
| 1 | Tape tip | Prevent burrs |
| 2 | Use nut | Preserve threads |
| 3 | Lubricate | Easier cut |
| 4 | Label | Organized storage |
Cut a Screw With a Hacksaw (Step-by-Step)
Start by picking a hacksaw with a fine-tooth blade so you get a clean cut without tearing the threads.
Clamp the screw securely in a vise or with locking pliers and protect the threads you’re keeping with a nut or tape.
Then saw steadily with short, even strokes to finish the cut cleanly.
Choose The Right Hacksaw
Before you cut, pick a hacksaw that matches the screw’s size and material so the job’s quick and clean. Choose blade TPI and frame type, considering environmental impact and historical uses of tools.
Match hardness to screw metal. Use:
- Fine TPI for small screws
- Coarse for soft metal
- Bi-metal for hardened screws
- Comfortable frame for control
Secure And Cut Cleanly
Once you’ve clamped the screw securely, put on eye protection and position the hacksaw so the blade teeth contact the marked cut line at a shallow angle.
Saw with steady, even strokes, letting the blade do the work. Stop periodically to apply screw lubrication, clear filings, and check alignment.
File burrs smooth for proper thread repair and test fit before final installation.
Cut a Screw With Bolt Cutters (Step-by-Step)
When a screw’s length won’t fit your project, bolt cutters give you a quick, clean way to trim it down—just position the jaws close to the head, squeeze firmly, and you’ll shear the shaft without rounding the threads.
Consider screw head design and corrosion resistance when choosing cutters.
Pick cutters that match the screw head and resist rust to protect threads and long-term performance.
- Clamp screw in vice
- Align cutter near head
- Squeeze sharply
- File burrs smooth
Cut a Screw With an Angle Grinder (Step-by-Step)
If bolt cutters won’t fit your workspace or you need to remove a lot of metal quickly, an angle grinder lets you cut screws fast and flush.
Wear eye, ear, and glove protection, secure the screw in a vise, and mark your cut.
Grind carefully, cool frequently to protect coating preservation, deburr with a file, and inspect threads for damage needing thread repair.
Cut a Screw With a Dremel or Rotary Tool (Step-by-Step)
Before you start, secure the screw in a vise or clamp and mark the cut line so you know exactly where to stop.
Use a Dremel or rotary tool with a cutting wheel to trim the screw, keeping steady pressure and short passes to avoid overheating.
Finish by filing the cut edge and re-cleaning the threads so the screw fits and turns smoothly.
Prepare The Screw
Since rotary tools spin fast, secure the screw and mark the cut clearly so you get a clean, controlled trim.
Check the screw head type and measure usable length. Note thread pitch to preserve fit.
Use safety goggles and clamp. Align cutting wheel with mark.
- Clamp screw
- Mark cut
- Confirm head and pitch
- Wear eye protection
Cut And Finish
When you’re ready, mount a thin cutting wheel on your Dremel. Clamp the screw in a bench vise with the marked line exposed.
Run the tool at a moderate speed so the wheel slices through the shaft cleanly.
File the cut edge smooth, deburr, and check threads for fastener compatibility.
Apply rust inhibitor or plating to prevent screw corrosion before installation.
Cut a Screw With a Metal-Cutting Saw
Need a clean, quick cut? Use a metal-cutting saw to shorten screws safely. Clamp the screw, apply screw lubrication to reduce heat, and use magnetic screw guides to keep parts steady.
Steps:
- Mark cut line.
- Clamp with a vise.
- Saw slowly, cooling occasionally.
- File burrs and test fit.
Wear eye protection and work gloves.
Remove the Screw Head vs Shorten the Shaft: When to Do Each
If the screw’s head will still be accessible and needs to drive or hold a fastener, shorten the shaft.
If the head prevents flush seating or clearance, remove the head instead.
You’ll choose based on function: preserve the head for engagement, cut head for clearance.
Consider thread repair needs and aim for coating preservation by minimizing heat and abrasion.
Preserve threads and coatings—minimize heat and abrasion, and plan for any necessary thread repair.
Use proper tools and steady technique.
Re-Form Threads With a Die (Step-by-Step)
Because the cut or crush that shortened the screw often deforms the threads, you’ll want to re-form them with a die before reinstalling the fastener.
You’ll perform thread reformation to restore screw threading.
Steps:
- Secure the screw in a vice.
- Select the correct die.
- Lubricate and run the die over the threads.
- Test fit and repeat if needed.
File and Deburr a Cut Screw for Clean Threading
Once you’ve reformed the threads, clean up the cut end by filing and deburring so the screw will thread smoothly and won’t damage the mating part. Use fine files for thread polishing, remove burrs with a deburring tool, and apply light screw lubrication to protect threads. Test fit gently and refile if needed.
| Calm | Confident |
|---|---|
| Care | Pride |
| Steady | Secure |
| Precise | Ready |
| Clean | Assured |
Shorten Sheet-Metal and Self-Tapping Screws Safely
First, check what the screw’s made of so you pick a cutting method that won’t weaken it.
Next, choose the right tool—snips, a rotary cutter, or a hacksaw—based on hardness and thread type.
After cutting, deburr the end and test-fit the screw to make sure it drives and seals properly.
Assess Screw Material
How can you tell which screws are safe to trim? You’ll need to assess screw material and identify screw composition before trimming sheet‑metal or self‑tapping screws.
Check these points:
- Magnetic test for steel
- Visual plating or rust for carbon steel
- Markings for stainless grades
- Brittle or soft feel indicating alloys or zinc
Use these clues to decide whether trimming’s safe.
Choose Cutting Method
Before you cut, pick a method that matches the screw’s material, length to remove, and your tools—because the wrong approach can strip threads, heat‑weaken the shaft, or leave jagged edges that won’t seat.
Use bolt cutters or a hacksaw for soft sheet‑metal screws, and a cutoff wheel for hardened self‑tappers; control heat to protect material corrosion resistance and preserve screw aesthetics.
Deburr And Test Fit
When you’ve cut a sheet‑metal or self‑tapping screw, deburr the cut end and test the fit so threads run smoothly and the fastener seats fully without wobble or binding. Follow steps:
- File burrs with a small flat file.
- Remove metal shavings.
- Check screw aesthetics; reshape head if needed.
- Perform thread repair or chase damaged threads, then test fit.
Shorten Wood Screws Without Damaging the Tip
If you need a shorter wood screw but want to keep the sharp, threaded tip intact, use methods that remove length from the head end or grind the shank away from the point; this preserves bite and makes driving easier.
Clamp the screw, cut near the head with a hacksaw, file smooth, and protect decorative finishes.
Inspect threads and perform any thread repair before use.
Handle Hardened and Stainless Screws Differently
Hardened screws resist cutting and will blunt tools quickly, so you’ll need a high-speed cutoff wheel or carbide blade and steady, light pressure.
Stainless screws work differently — they tend to gall and heat up, so you should use lubrication, slower cutting speeds, and frequent breaks to keep the metal from seizing.
Treat each type on its own terms to avoid damaged tools or ruined threads.
Hardened Screw Challenges
Because hardened and stainless screws respond very differently to cutting, you’ll need to change tools and technique rather than treating them the same.
For hardened screw challenges, use hardened steel bits, apply screw lubrication, and work slowly.
Consider:
- High-speed cutting wheel
- Carbide or diamond blade
- Firm clamping
- Cooling breaks
You’ll avoid bit damage and heat buildup by following these steps.
Stainless Screw Techniques
Stainless screws behave differently from hardened ones, so swap your approach: use high-quality cobalt or TiN-coated drill bits, a fine-toothed hacksaw or cut-off wheel made for stainless, and plenty of cutting oil to reduce work hardening.
Clamp the screw securely, cut slowly, and keep surfaces cool with screw lubrication.
File burrs, chase threads with a die for clean threading repair, and test fit before reuse.
Shorten Very Small Machine Screws
When you need to shorten very small machine screws, work slowly and use tools that match their tiny size so you don’t wreck the threads or head. A fine-tooth jewelers’ saw or a small rotary tool with a cutoff wheel gives the best control.
Protect finish for screw aesthetics and check thread compatibility.
Steps:
- Secure in pin vise.
- Mark cut line.
- Cut carefully.
- File and deburr.
Shorten Long Lag Bolts and Studs Effectively
When you shorten long lag bolts and studs, start by picking the correct bolt grade and diameter so it still carries the load.
Use proper cutting methods—like a hacksaw with a guide or an abrasive cutoff wheel—and clamp the part securely to keep the cut square.
After cutting, re-tap or repair the threads so the fastener threads cleanly into its mating part.
Choose The Right Bolt
Before you cut a lag bolt or stud, pick the right fastener for the job so the shortened piece still meets strength and corrosion needs. Check the screw head type and plan for thread repair if needed.
Consider:
- Material (steel, stainless)
- Grade/strength
- Length allowance for embedment
- Corrosion resistance and coating
Proper Cutting Methods
If you need to shorten lag bolts or studs, pick a cutting method that preserves thread integrity and prevents heat or burr damage.
Use a hacksaw with steady strokes for control, a cutoff wheel with light pressure and cooling, or a bolt cutter for softer studs.
File the end to remove burrs, protect coating preservation, and plan for possible thread repair later if needed.
Re-Tap Or Thread Repair
Because cutting screws or studs often nicks the threads, you’ll usually need to re‑tap or repair them to restore full engagement and guarantee safe fastening.
You’ll clean, lubricate, and re‑cut threads carefully. Use proper tap size, apply screw lubrication, and inspect fit.
Steps:
- Secure stud
- Clean damaged threads
- Re‑tap with correct die
- Test engagement for thread repair
Preserve Holding Strength After Cutting (Tactics)
When you shorten a screw, you’ll want to take steps that keep its threads biting into the material—otherwise the fastener can lose grip and the joint will fail.
Use a file to chamfer the cut end and clean burrs.
File and chamfer the cut end, removing burrs so the threads seat cleanly and bite properly.
Preserve the screw head for proper drive.
Apply thread repair paste or a small insert if threads are damaged.
Match washer or lock washer to maintain clamping force.
Test a Shortened Screw for Fit and Holding Power
After you cut and clean a screw, don’t just assume it’ll hold—test it. Try these steps to confirm fit and strength:
- Check screw head seating and drive engagement.
- Hand-thread into the project, feeling for smooth threads.
- Apply final torque with appropriate driver; watch for strip or bind.
- If threads deform, stop and perform thread repair or replace the screw.
Preserve Coatings and Finishes When Cutting
When you cut a screw, shield the surrounding coating so the cut edge stays protected and corrosion-resistant. Slip on a protective sleeve or wrap the shank with tape before snipping to prevent chipping and metal exposure.
After cutting, touch up the bare end with a compatible finish or rust inhibitor to restore protection.
Protect Coating Edges
If you want cut screws to keep their original finish, take steps to protect the coating edges before you trim them—masking, gentle grinding, or using proper cutting tools will prevent chipping and corrosion at the exposed ends.
You should focus on Protect coating and Edge preservation by following these steps:
- Mask threads
- Score coating
- Use fine-wheel cutter
- Seal exposed metal
Use Protective Sleeves
To keep a screw’s finish intact after scoring, masking, and sealing, slip on a protective sleeve before you cut so the coating around the cut stays undisturbed.
You’ll slide protective sleeves over the shaft, align the cut, and clamp gently.
Use safety shields or a small guard to block sparks and metal shards.
Remove sleeve carefully to inspect the coating.
Refinish Cut Ends
Because the cut end is exposed metal, you’ll want to refinish it immediately to restore corrosion resistance and match the original coating.
Clean, deburr, then match finish to screw color and thread gauge.
Steps:
- File and sand cut smooth.
- Apply primer if needed.
- Touch up paint or plating to match screw color.
- Seal with clear coat for corrosion protection.
Cut Screws That Are Held in Place vs Loose Screws
When a screw’s already anchored in material, you’ll handle it differently than a loose screw. Anchored screws require more caution to avoid damaging the surrounding work.
For held screws, cut flush with a rotary tool, deburr, and check for screw corrosion before reusing.
For loose screws, remove, measure, trim, and inspect threads—perform thread repair or replace if damaged to guarantee secure fastening.
How to Salvage a Screw Cut Incorrectly
If you’ve trimmed a screw too short or damaged its head, don’t toss it immediately; you can often salvage it with a few careful steps.
- Inspect for screw deformation and decide if usable.
- File a damaged head flat or create a new slot.
- Use a thread repair file or tap for thread repair.
- Test fit; if weak, recycle and replace.
Common Mistakes That Strip Threads or Weaken Screws
Although you’re careful, a few simple errors can strip threads or weaken a screw beyond repair. You’ll overtighten, use wrong dies, or cut without deburring, all damaging threads and altering strength.
Ignoring material grade or historical screw design tolerances risks failure.
Dispose of ruined screws responsibly to limit environmental impact, and replace compromised fasteners rather than forcing faulty repairs.
Safety Precautions to Prevent Injury and Sparks
Before you start cutting, equip yourself with proper eye protection, gloves, and hearing protection—this keeps metal shards, sparks, and loud tools from injuring you.
Use Safety gear and follow injury prevention steps:
- Clamp screw securely.
- Keep a fireproof surface.
- Aim sparks away from flammables.
- Turn off power tools before adjustments.
Work deliberately, check tool condition, and stay focused.
Alternatives to Cutting: Spacers, Washers, or Different Fasteners
When cutting seems unnecessary or risky, consider simpler fixes like adding spacers, stacking washers, or switching to a shorter or different-type fastener that matches your threading and load needs. You’ll explore alternative fastener options and spacer installation techniques to preserve strength and alignment. Choose compatible materials, test fit, and tighten to spec — avoid over-compressing spacers.
| Option | Benefit |
|---|---|
| Spacers | Maintain gap |
| Washers | Fine-tune length |
| Different fastener | Proper fit |
When to Replace Rather Than Shorten a Screw
If spacers, washers, or a different fastener won’t solve fit or strength problems, replacing the screw is often the smarter move.
You should replace when:
- Threads are stripped or damaged.
- Corrosion compromises holding power.
- Proper screw lubrication can’t restore function.
- Environmental impact demands a different material.
Choose replacement to guarantee safety, longevity, and proper function.
Choose Replacement Screw Sizes and Lengths
Start by matching the original screw’s diameter and thread type so the new fastener fits the hole and engages material properly.
Then pick a length that provides at least the same thread engagement (or slightly more) without bottoming out or protruding.
You’ll also consider color matching and aesthetic considerations—choose head style and finish to blend with the project while keeping proper strength and clearance.
Quick Checklist Before You Start Cutting Screws
Now that you’ve picked the right replacement screw size and length, run through a short checklist so you don’t damage the fastener, the tool, or the workpiece once you begin cutting. Follow these steps:
- Inspect for screw corrosion; replace if weakened.
- Verify correct bit and clamp setup.
- Mark cut line and protect threads for thread repair.
- Wear eye protection and test on scrap.
Frequently Asked Questions
Will Shortening a Screw Void Manufacturer Warranties or Certifications?
Yes — altering screws can void warranties and certifications; you’ll compromise manufacturing standards and risk failing inspections. Fastener aesthetics won’t justify it, so check manufacturer policies and use approved alternatives to keep coverage intact.
Can a Shortened Screw Be Used in Structural or Load-Bearing Applications?
About 60% of failures trace to improper fastener use: you shouldn’t use a shortened screw in structural or load-bearing applications unless testing proves preserved thread integrity and load capacity, and manufacturers explicitly approve that modification.
How Do Temperature Extremes Affect a Shortened Screw’s Performance?
Extreme temperatures can weaken a shortened screw’s material integrity and alter thermal expansion, so you’ll see reduced load capacity and possible loosening or cracking; you’ll need proper material selection and allowances for expansion to maintain safety.
Can You Electroplate or Recoat a Screw After Cutting to Prevent Corrosion?
Like repainting a rusted bike chain, you can electroplate or recoat a screw after cutting to prevent corrosion. You’ll weigh Electroplating options (nickel, zinc) and Recoating techniques (cold galvanizing, powder coat) for best protection.
Are There Legal or Code Restrictions on Modifying Fasteners in Building Projects?
Yes — you can’t assume freedom: Fastener regulations and Building codes often prohibit altering certified fasteners or require equivalent replacements, so you’ll check project specs, manufacturer guidance, and local codes before modifying or using altered fasteners.
Conclusion
Yes — you can trim screws when a full‑length fastener would be a little too enthusiastic for the job. With a file, hacksaw, or bolt cutter and a bit of care to keep the threads tidy, you’ll get a neat, safe fit without inviting trouble. If the screw’s been through the wars or holds critical loads, don’t skimp—replace it. Otherwise, shorten confidently and enjoy a tidy, discreet fix that keeps your project looking composed.